


Day 8/ 30 Days of Linux Mastery: Access Control List

Table of Contents
Introduction
Welcome back to Day 8!
Today was all about Access Control, how Linux systems allow or restrict users and groups from accessing specific files and directories. The basic Linux permissions model (user-group-others) is solid, but in real cloud environments with multiple users, teams, roles, and access levels, it quickly gets limiting.
What if:
You want to give multiple users different levels of access to the same file?
You don’t want to change file ownership or group just to add a new person?
You are working on shared cloud environments with multiple teams?
That’s where Access Control Lists (ACLs) come in.
What is Access Control?
ACL allows more than one user or group to have different permissions on the same file or directory. Think of it as a flexible access rulebook.
You can:
Core ACL Commands
| ACL Commands | Purpose |
|---|---|
getfacl 'directory name'
|
View all ACLs on a file/folder |
setfacl -m u:'username':'permission' 'file or directory name'
|
Add/modify user ACL |
setfacl -x u:'username': 'file/directory'
|
Remove user ACL |
setfacl -d -m u:'username':'permission' 'file/directory
|
Set default ACL |
setfacl -m g:'groupname':'permission' 'file or directory name'
|
Add/modify group ACL |
setfacl -x g:'groupname': 'file/directory'
|
Remove group ACL |
setfacl -b 'file/directory'
|
Remove all ACLs |
setfacl -R -m u:'user':'permission' 'file or directory'
|
Apply ACLs recursively |
Real-World Scenario: Multi-Team Shared Folder Access
You manage a shared folder – devopsproject.
You want:
- AmandaIgwe – DevOps team to have full access
- Felix – Our Auditor to have read-only access
- Jean – Intern to have no access
- Let’s check if there is ACL applied to the devopsproject folder first
ls -ld
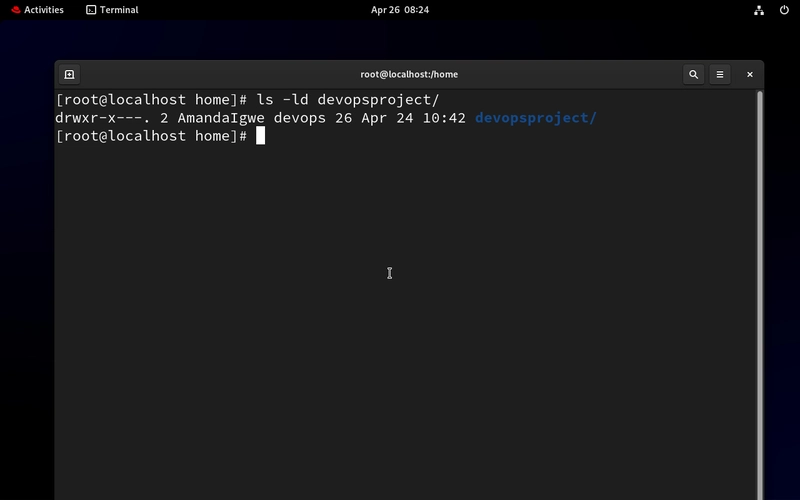
Notice there is no ACL. If there is an ACL applied, there will be a plus sign at the end of the permission.
- Let’s apply ACL for the User, AmandaIgwe and give full access to the devopsproject directory.
setfacl -m u:AmandaIgwe:rwx devopsproject/
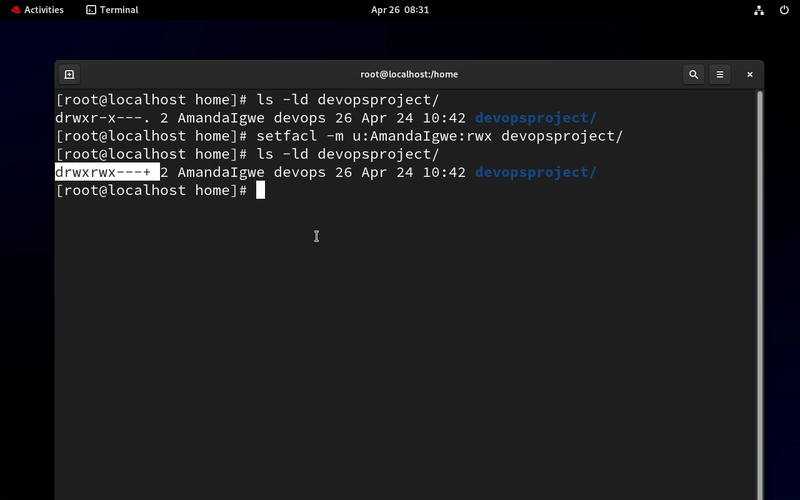
Notice the plus (+) sign? It shows ACL has been applied.
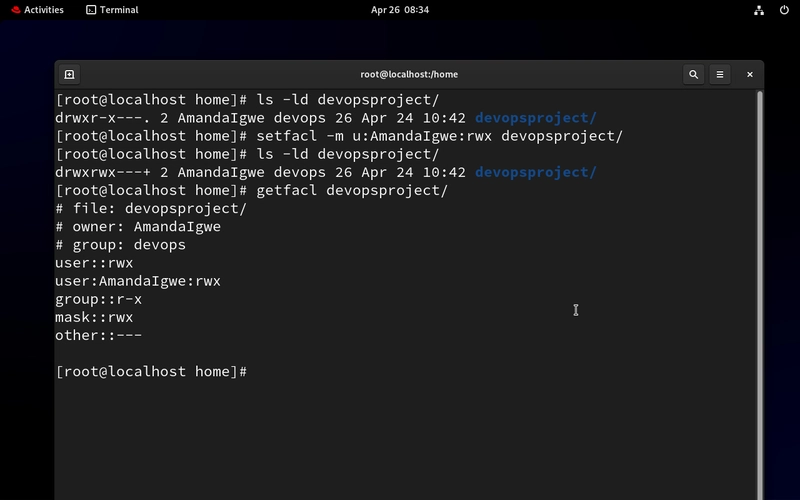
getfacl devopsproject/
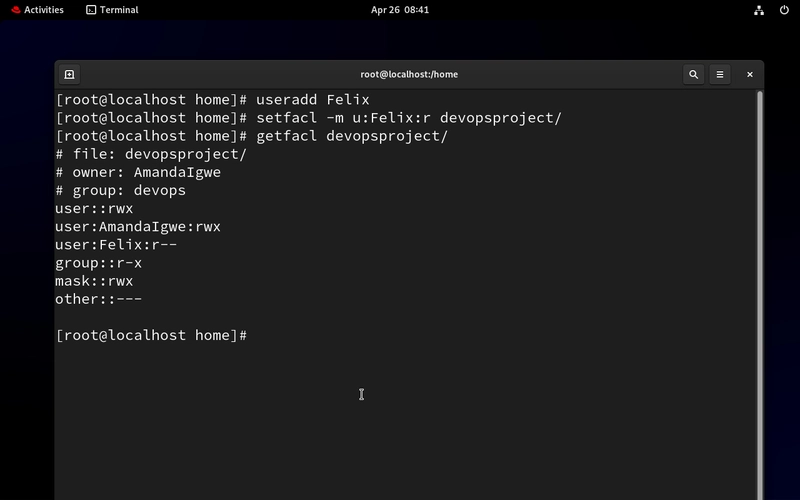
- Let’s create the Auditor “Felix” and give him just read access to the devopsproject folder
useradd Felix    - to add a user
setfacl -m u:Felix:r devopsproject/
getfacl devopsproject/
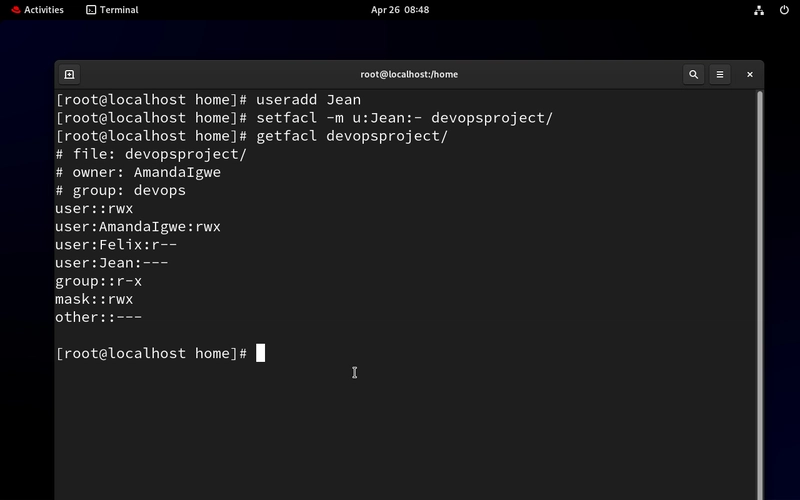
- Let’s create our Intern “Jean” and give her no access to the devopsproject folder
setfacl -m u:Jean:- devopsproject/
getfacl devopsproject/
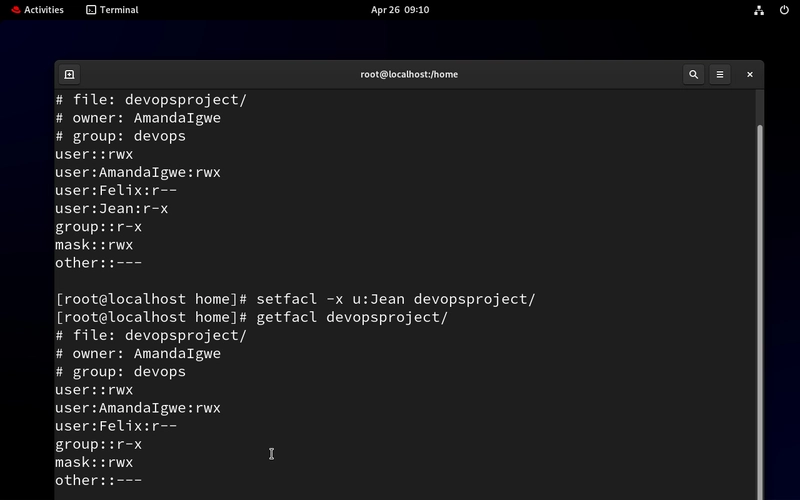
- Revoke Access from a User.
Initially, we gave our intern, Jean, no access. Let’s give her the read and execute access. Then we will revoke all acl access for her.
setfacl -x u:Jean devopsproject/
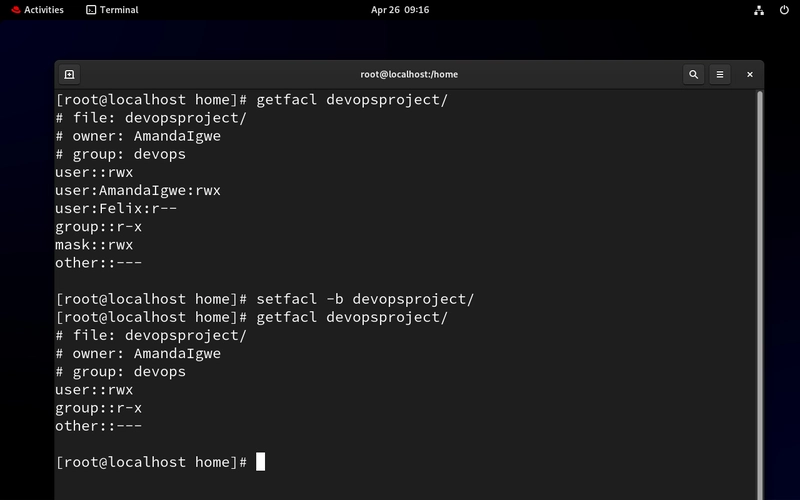
setfacl -b devopsproject/
Note: To give access to group is same way, only thing is you replace u which is the user with the g which stands for group and replace it with the group name.
And that’s it!
Conclusion
ACLs unlock powerful permission control in Linux. In real DevOps environments, especially in multi-team, multi-project settings, it’s the go-to method for managing access without breaking ownership or group structures.
If this is helpful to you, feel free to bookmark, comment, like and follow me for Day 9!
Let’s Connect!
If you want to connect or share your journey, feel free to reach out on LinkedIn.
I am always happy to learn and build with others in the tech space.
#30DaysLinuxChallenge #Redhat#RHCSA #RHCE #CloudWhistler #Linux #Rhel #Ansible #Vim #CloudComputing #DevOps #LinuxAutomation #IaC #SysAdmin#CloudEngineer


")