


Utilizing Neon Serverless PostgresDB using .NET8 via Entity FrameworkCore + NpgSQL

In this blog, we will integrate Neon Database in .NET Console App using Entity Framework Core and NpgSQL. We will generate database tables via Entity Framework migrations without writing any SQL Queries or manually creating it from the Neon portal. Also, we will be connecting to the database using EFCore as well and preview the data using .NET LINQ Queries.
We will also going to create , update, delete data from our Neon Database table. We will use Visual Studio 2022 for the demo. Note that this blog will not be covering the other .NET concepts like Repository Pattern in .NET and we will be directly going to communicate with Neon to focus mainly on data access.
Prerequisites
- Basic knowledge of C# .NET
- Experience in C# LINQ statements and expressions
- Familiarity on Entity Framework
You will learn how to
- Create .NET C# Console Application
- Install Nugget Dependencies
- Configure DatabaseContext for Neon Postgres
- Generate tables dynamically using EntityFrameworkCore + NpgSQL + NpgSQL.EntityFrameworkCore to Neon Database
- Create, read,update,delete data using C# .NET to Neon Database Table
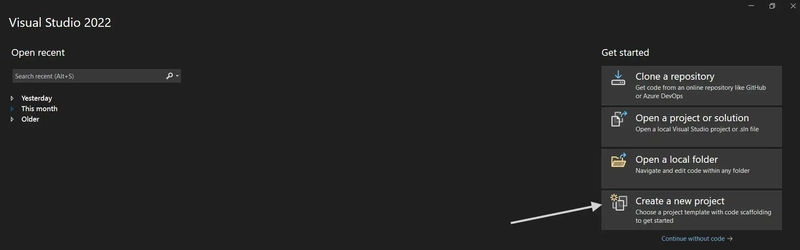
First, let’s create our new .NET Console Application in Visual Studio 2022. Open Visual Studio 2022 in your local computer, if not installed you can download from this link https://visualstudio.microsoft.com/ . It will take some time to install . Once installed open the Visual Studio 2022. Click the create a new project button.
A new window will show up “create your new project”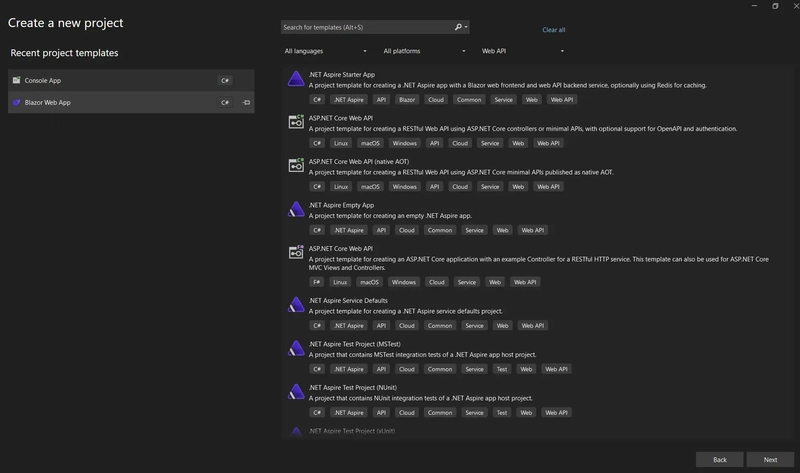
Search for “Console” and click the “Console App C# ” follow the white arrow then click next button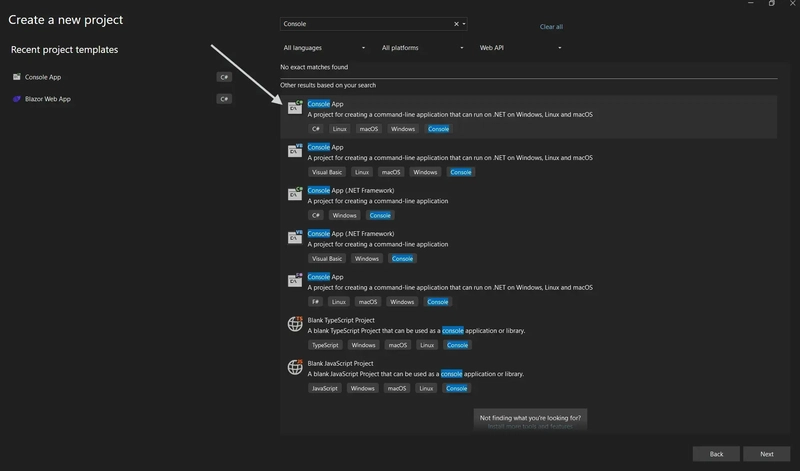
Enter the name of your project . In our case, i will name it as “NeonEFCoreDemo” then click next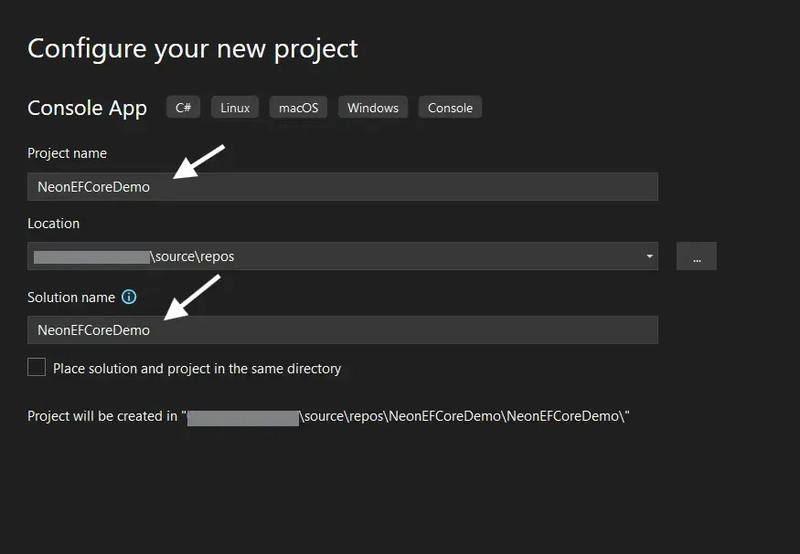
Select .NET 8.0 as framework. Do not check / select the enable container support as we will not be using docker in this blog. Check the do not use top-level statements. Click create button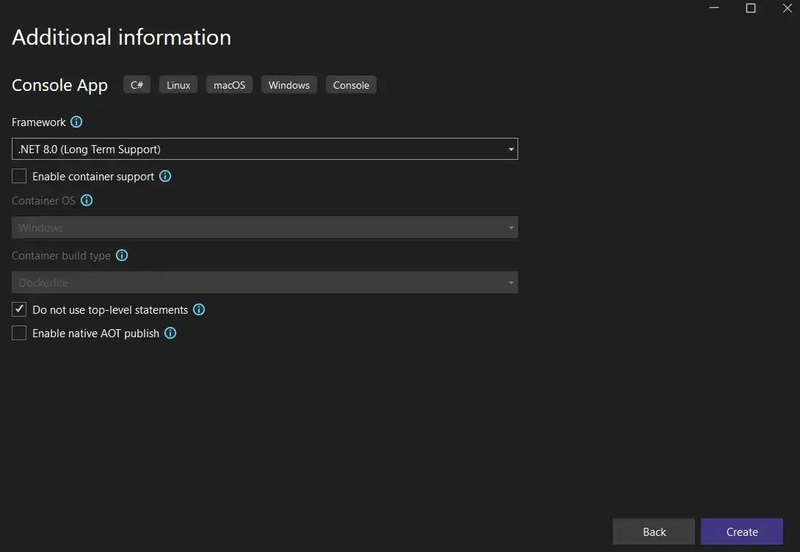
Now our C# Console Application has been created 
Let’s install our dependencies. Go to Project > Manage Nugget Packages..
![]()
Manage Nugget Packages will show up, as you can see in the installed tab we do not have any packages installed. so now, let’s install the packages that we will be needing. Click Browse to search.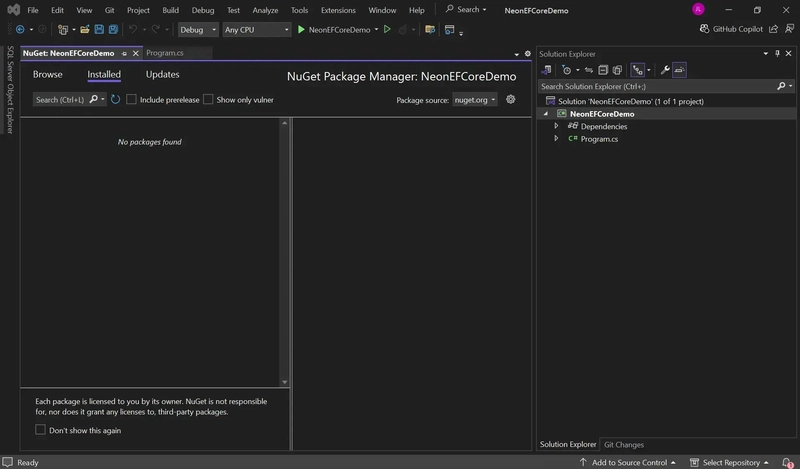
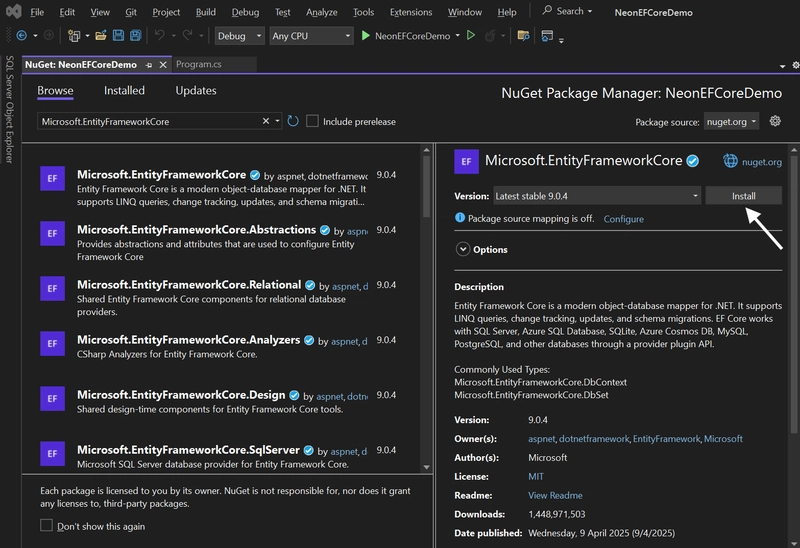
Search for “Microsoft.EntityFrameworkCore” in my case it is version 9.0.4 and click install.
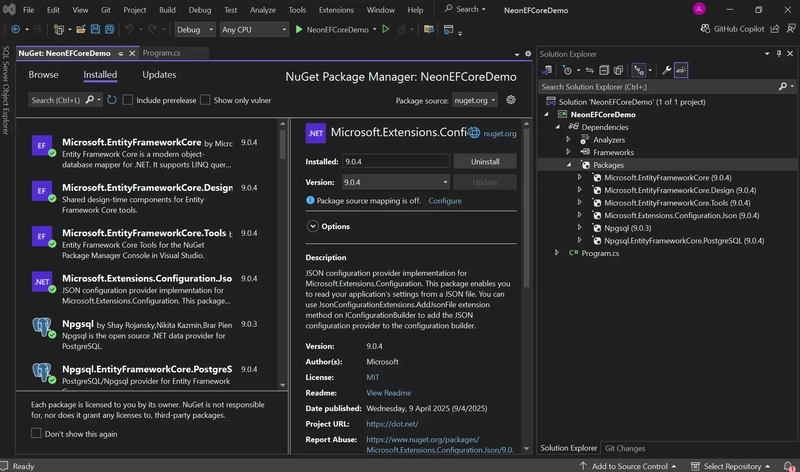
Once installed you will see something like this. “Uninstall” button has been enabled. If you observe in the solution explorer > NeonEFCoreDemo > Dependencies > Packages it is there! it means it has been added to our project.

Let’s install these required packages as well:
- Microsoft.EntityFrameworkCore.Design
- Microsoft.EntityFrameworkCore.Tools
- NpgSQL
- NpgSQL.EntityFrameworkCore.PostgreSQL
- Microsoft.Extensions.Configuration.Json
Microsoft.EntityFrameworkCore.Design
this package allows us to create our database table and update the structure of if via migrations(using ‘Add-Migration’ and ‘Update-Database’ command ) behind the scenes .
It generate tables based on your Model Classes. To make it simple it will help us to sync the structure of our tables columns without worrying the database infrastructure side whatever changes we have, we change only to code level and it will sync after we do the migration.
Microsoft.EntityFrameworkCore.Tools
this package works as enabler of command line tools for us to execute Entity Framework related commands like Add-Migration Update-Database from the Package Manager Console or dotnet CLI
NpgSQL
this package is a .NET data provider that allows .NET applications (like those using C# or ASP.NET) to interact with PostgreSQL databases. It allows us to connect to a PostgreSQL database/server and execute SQL commands, retrieve data, and perform other database operations from your .NET application.
NpgSQL.EntityFrameworkCore.PostgreSQL
this package integrates PostgresSQL with EntityFramework . Meaning , we are able to work with data using LINQ queries, migrations, and data models with PostgreSQL and working on object oriented manner.
Microsoft.Extensions.Configuration.Json
this package allows you to read configuration data from JSON files, such as appsettings.json or any other JSON file. We will be using this module to get the connection string from appsettings.json to our console app.
Finally we are able to install all the dependencies that we need to integrate smoothly to Neon Database. To verify go to installed tab or NeonEFCoreDemo > Dependencies > Packages
Create Models
In the Solution Explorer, let’s create a new folder called “Models” 
then let’s create Todo model. right click add > new item > Todo.cs
This Todo will have two property 1 is ID, and 2nd is Title which is string
using System;
using System.Collections.Generic;
using System.Linq;
using System.Text;
using System.Threading.Tasks;

namespace NeonEFCoreDemo.Models
{
    public class Todo
    {
        public int Id { get; set; }

        public string Title { get; set; }

    }
}
let’s create another model called hobby
using System;
using System.Collections.Generic;
using System.Linq;
using System.Text;
using System.Threading.Tasks;

namespace NeonEFCoreDemo.Models
{
    public class Hobby
    {
        public int Id { get; set; }

        public string Title { get; set; }

    }
}
Create appSettings.json
As you can see in our application, there is no appsettings.json available. let’s create that file and name as “appsettings.json” 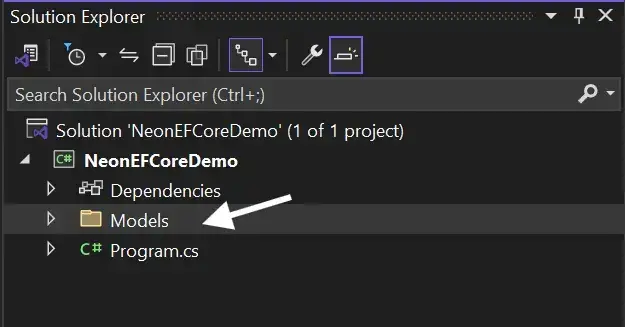
In appsettings.json paste the following code. In the DefaultConnection you need to pass in your actual connection string from the Neon Portal
{
  "ConnectionStrings": {
    "DefaultConnection": ""
  }
}
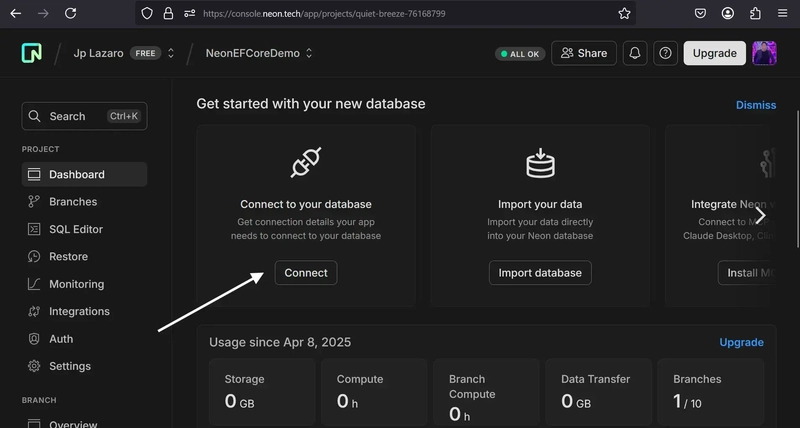
To get your database connection string go to console.neon.tech and login your account then
select your project > NeonEFCoreDemo > Connect to your database > click connect
This window will show up, click the drop down connection string to .NET
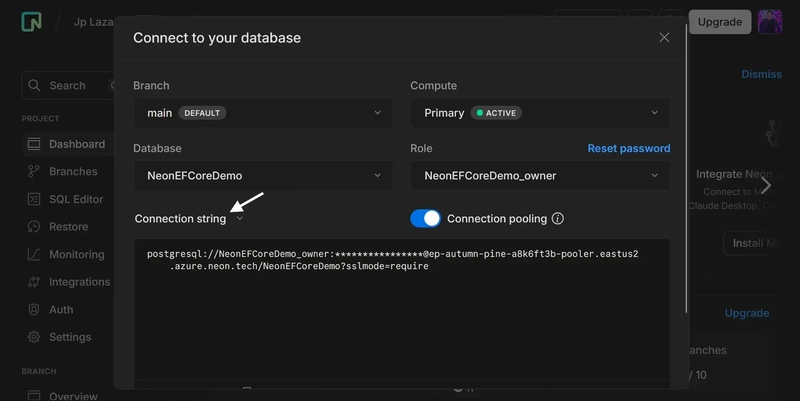
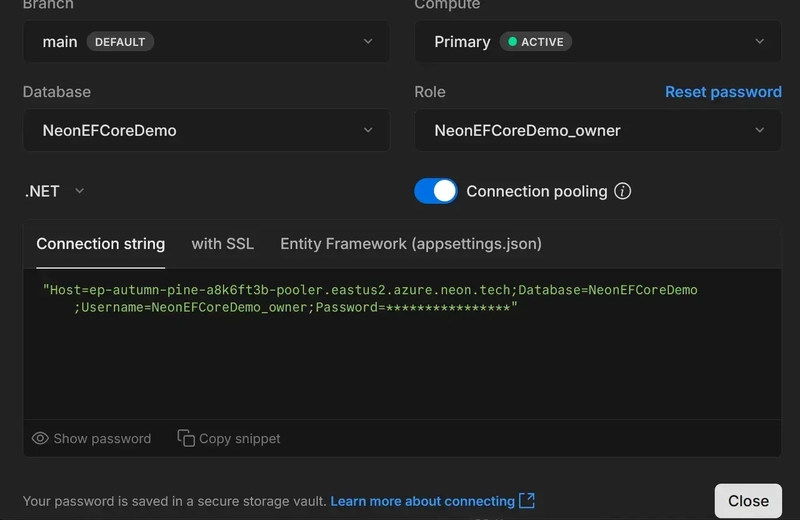
then copy the connection string and paste it to your appsettings.json
{
  "ConnectionStrings": {
    "DefaultConnection": "pastehere"
  }
}
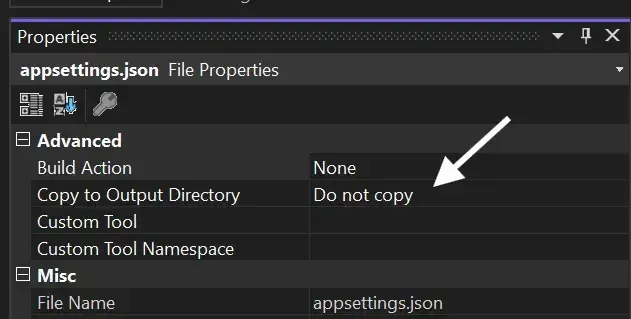
After that, in the solution explorer right click on appsettings.json and click properties.
Change the Copy to Output Directory from “Do not Copy” to “Copy always”
Create AppDbContext
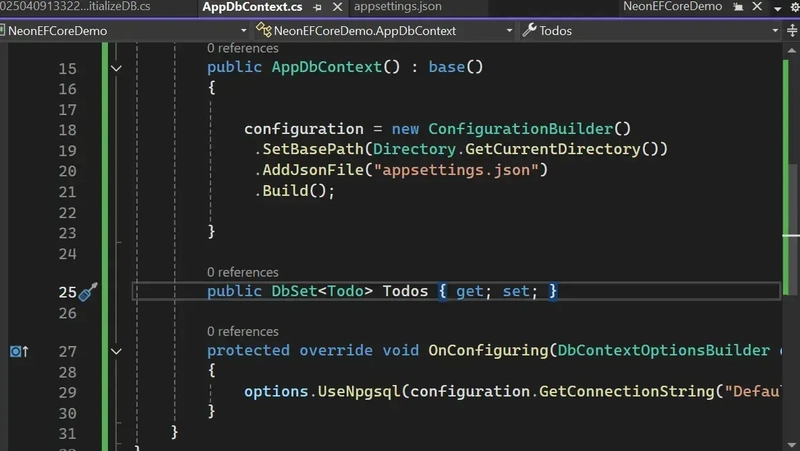
After copying the connectiong string to appSettings.json. Now let’s create the AppDbContext, this file will enable the entire functionality of Entity Framework.
Add > New Item> AppDbContext.cs . In the AppDbContext.cs file copy paste the code below.
AppDbContext inherits to DbContext which is a class from EF.
DbSet maps your database tables to specific Model which is called entities. In our case we have Todos table that represents Todo data type same goes to Hobby. AppDbContext implements override OnConfiguring – it is a EF method as well that fires when setting up the connection to the database. Inside the onConfiguring we called the UseNpSQL which is the package used to enable .NET + Postgres integration and we are passing the connection string value from the appsettings.json.
using Microsoft.EntityFrameworkCore;
using NeonEFCoreDemo.Models;
using System;
using System.Collections.Generic;
using System.Linq;
using System.Text;
using System.Threading.Tasks;
using Microsoft.Extensions.Configuration;

namespace NeonEFCoreDemo
{
    public class AppDbContext : DbContext
    {
        private readonly IConfiguration configuration;
        public AppDbContext() : base()
        {

            configuration = new ConfigurationBuilder()
             .SetBasePath(Directory.GetCurrentDirectory())
             .AddJsonFile("appsettings.json")
             .Build();

        }

        public DbSet<Todo> Todos { get; set; }

        protected override void OnConfiguring(DbContextOptionsBuilder options)
        {
            options.UseNpgsql(configuration.GetConnectionString("DefaultConnection"));
        }
    }
}
Generate Tables on Neon using EF Migrations
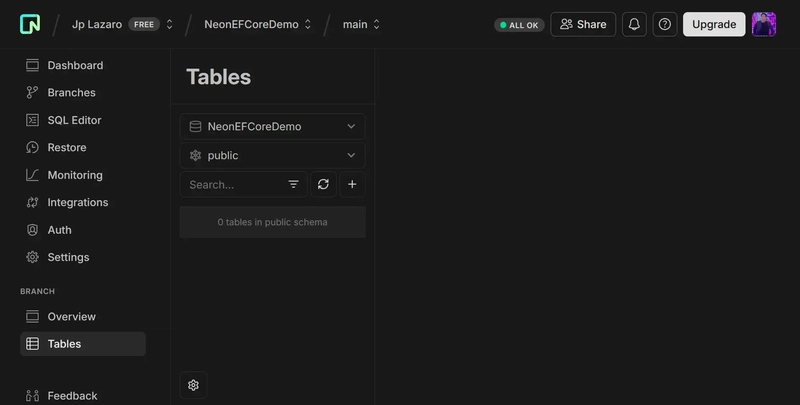
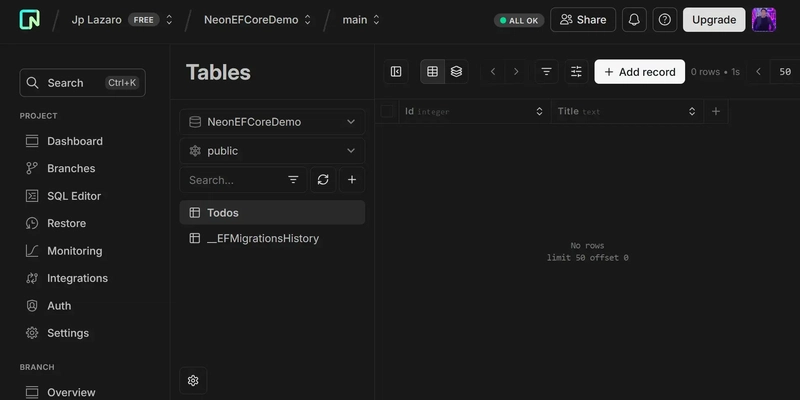
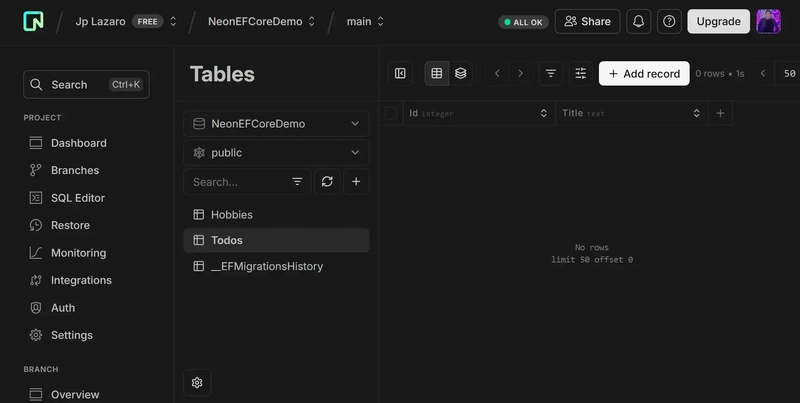
As you can see here in my Neon console, as of the moment we do not have tables yet.
Now let’s generate using Entity Framework Migrations, In Visual Studio , open the Package Manager Console
Go to Tools > Nuget Package Manager > Package Manager Console
This window will show up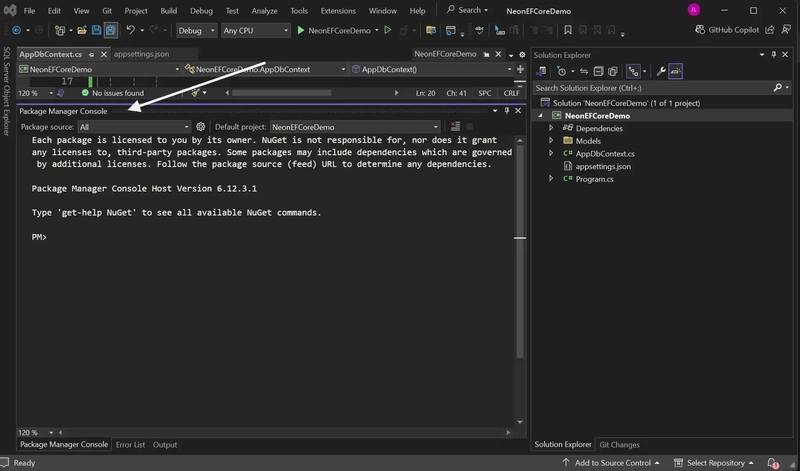
Let’s run the command
Add-Migration initializeDB
It will generate migration folder and files 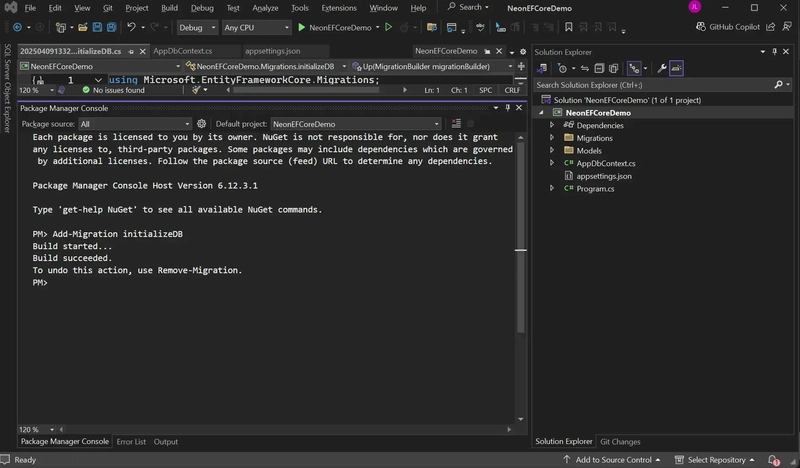
Now let’s update our database and run the update-database command
Update-Database
Finally! We are able to generate the tables on our Neon project.
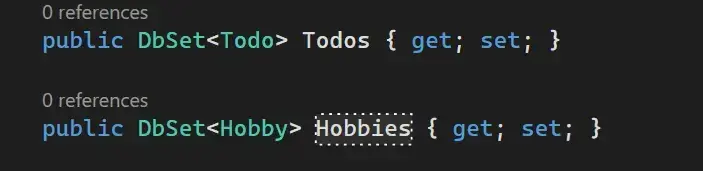
But the hobbies table is not there. Let’s add it to our database. Let’s go back to AppDbContext.cs. As you can see here there is no hobby in the DBSet only Todos has, so this was the reason why EF does not include the Hobby. Let’s Add it.
After adding it, it will look like this. Save it.
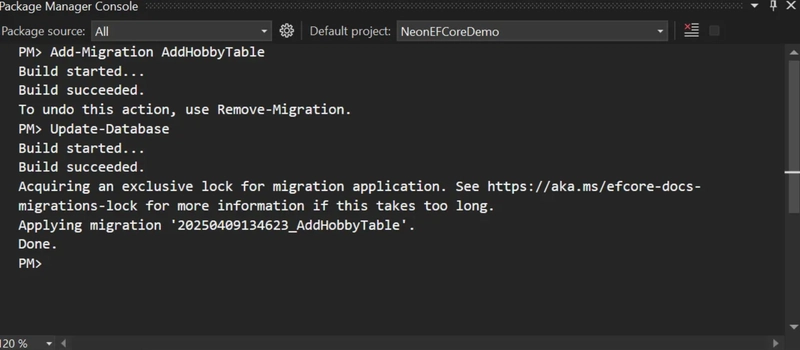
Now let’s do another migration. Open the Package Manager Console execute the
Add-Migration command but this time we need to change a little bit. Let’s use Add-Migration addHobbyTable then update database
Add-Migration addHobbyTable
Update-Database
It will look like this
Now let’s verify if the changes was reflected to our Neon console.
There you go! we are able to update our database structure very fast using the Entity Framework Core Migrations. We can directly sync it from our code level to database infrastructure.
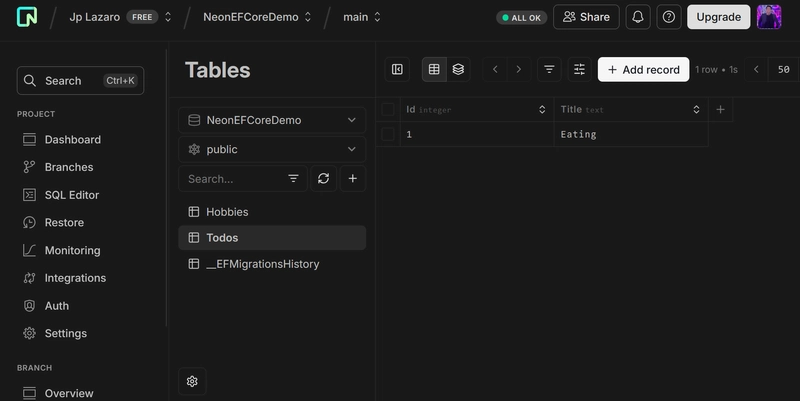
In program.cs, let’s create a new Todo object with name “eating”
Then let’s create instance of AppDbContext called context
Then use context.Todos.Add method to add the todo object to Todos table in the database
Then call SaveChanges() and that’s it! Let’s run the app
Now let’s verify the changes in Neon console
  var todo = new Todo()
  {
      Title = "Eating",
  };

  var context = new AppDbContext();
  context.Todos.Add(todo);
  context.SaveChanges();

  Console.WriteLine("");
  Console.Read();
There you go! As you can see the data that we have added has been added
Now let’s update the “eating” to “eating fruits” . We have to change the code again. Delete all the codes inside the main method and paste the below code
var context = new AppDbContext();
var todo = context.Todos.Where(x=>x.Id == 1).FirstOrDefault();
todo.Title = "Eating Fruits";
context.SaveChanges();

Console.WriteLine("");
Console.Read();
Let’s verify, See now the changes 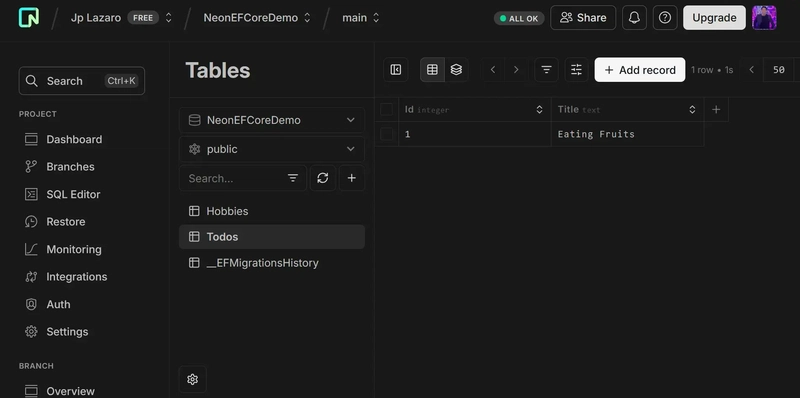
Now let’s delete the “eating fruits” data . To delete you have to get the data first using .Where method then use the context.Todos.Remove(todo) method and pass in the todo object that you need to remove
var context = new AppDbContext();
var todo = context.Todos.Where(x=>x.Id == 1).FirstOrDefault();
context.Todos.Remove(todo);
context.SaveChanges();

Console.WriteLine("");
Console.Read();
Let’s verify, Now it is gone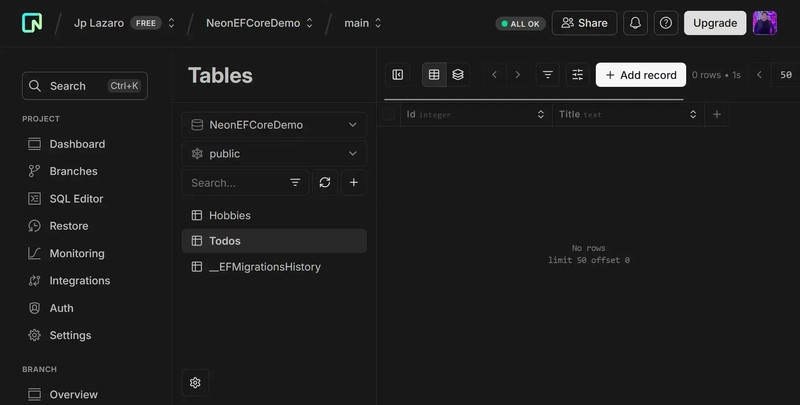
Now let’s add collection of data to Neon database table
 var todos = new List<Todo>();
 todos.Add(new Todo {
    Title = "Watch Netflix"
 });
 todos.Add(new Todo
 {
     Title = "Watch VivaMax"
 }); todos.Add(new Todo
 {
     Title = "Watch Disney+"
 });

 var context = new AppDbContext();
 context.Todos.AddRange(todos);
 context.SaveChanges();

 Console.WriteLine("");
 Console.Read();
Let’s verify, See now the changes . Also noticed that the ID field has been automatically incrementing
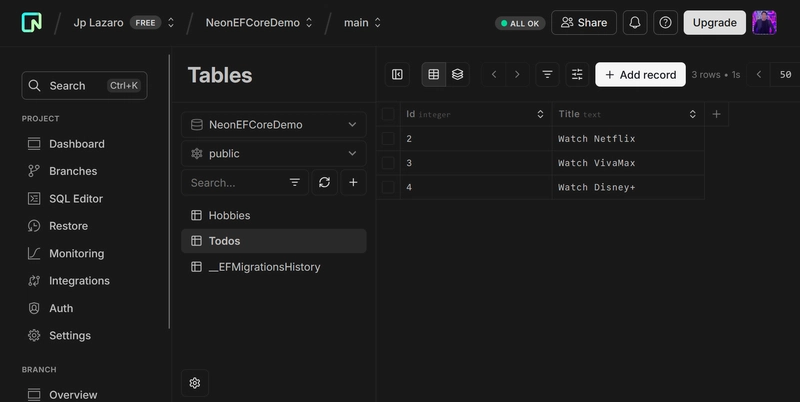
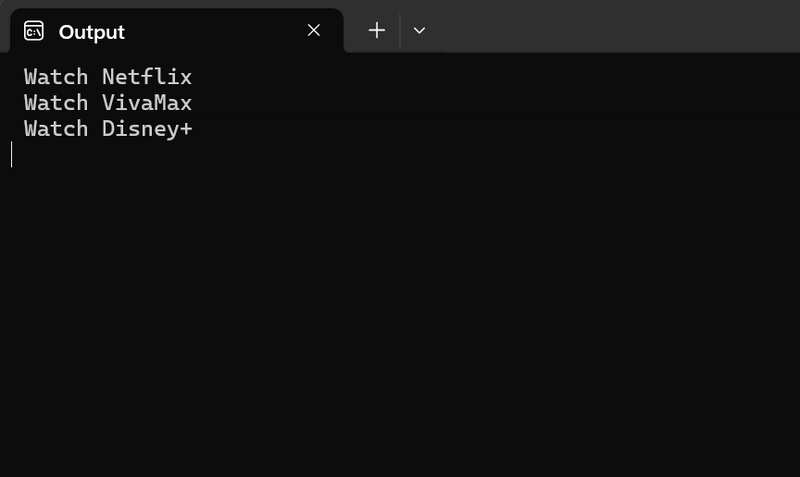
Now let’s print the collection of data from Neon database table to Console
 var context = new AppDbContext();
 var todos = context.Todos.ToList();

 foreach (var todo in todos)
 {
     Console.WriteLine($" {todo.Title} ");
 }
 Console.Read();
Let’s run the application see
Finally we are able to create database tables via .NET way.
We are also able to perform basic CRUD operation using entity framework.
Thank you for reading, if you find this blog interesting please comment. It helps me to write more blogs like this.


")
